
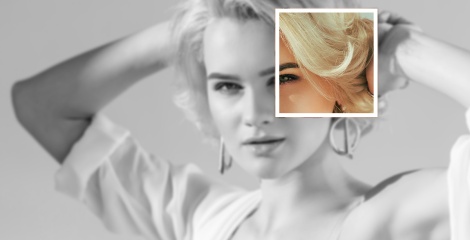
Whether you add a cute curl to your wig every day or every now and then, taking a break from heated styles can help keep your hairpiece healthy for longer.
But how else can you style a synthetic wig to achieve beautiful ringlets? Here, we’re sharing four heatless hair styling techniques for both human hair and synthetic wigs!
Why Do Heatless Curls on a Wig?
We wear wigs to feel fabulous, so it makes sense to keep them looking lovely. Even human hair and heat-friendly synthetic wigs are prone to breakage from frequent heat styling, and benefit from an occasional break. Meanwhile, heat styling tools can permanently damage the fibres of standard synthetic wigs, so high temperatures here are a no-no.
Giving your wig heatless curls can give you gorgeous waves while helping you save both your hair and money on tongs or straighteners.
How to Nail Heatless Curls on a Wig
Whether you’re working with human hair or wondering how to style a synthetic wig, these four heatless hair styling techniques can help you achieve beautiful, bouncy curls
Before heatlessly curling your wig, gently brush it out to remove any tangles or knots. Some women prefer to style their wig on a wig stand, so they can see the wig from all angles and check it’s evenly styled on all sides, whereas others prefer to wear their wig as they style it. It’s up to you, as long as you feel comfortable when crafting your heatless hairstyle
Regardless of if you have human hair or a synthetic wig, these four heatless curling techniques can be used to get gorgeous bouncy curls.
Bendy Rollers
Bendy rollers are brilliant for creating all kinds of heatless curls. They’re an affordable, tried-and-tested option, great for learning how you can style a human hair or synthetic wig. The smaller the bendy roller is, the more you’ll need to apply and the tighter the curls will be. On the other hand, larger bendy rollers are great if you’re after a voluminous look.
1. Slightly dampen your wig with water and take a small section of hair, about an inch wide and half an inch thick. The smaller the section of hair, the more defined the curl.
2. Take one bendy roller and wrap the hair around the middle. Roll the bendy roller down towards the scalp of the wig cap.
3. Fold the ends of the bendy roller towards one another to secure it in place and prevent the curls from falling out.
4. Repeat this process until you’ve covered the whole wig, then leave the curls to dry and set.
5. After a couple of hours, gently unroll the bendy rollers and unwrap the hair, starting at the bottom of the wig and moving up to the top.
Now you’ll have gorgeous heatless curls! If you want to set the curls in place for longer, apply a generous amount of hair spray.
Top Tip: You can also use this technique with velcro rollers, making sure to secure them in place with hairpins.
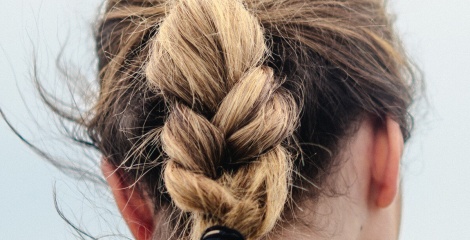
Plaits
One of the quickest, easiest and cost-effective routes to heatless curls is to plait your hair.
1. Start by slightly dampening your wig with water and sectioning the hair. For loose curls, separate the hair into thicker sections; for tight curls, use smaller sections.
2. Start plaiting! You’ll get different types of curls depending on the style you use, whether classic plait, fishtail braid, Dutch braid or French twist.
3. Secure each individual plait using a hair bobble or elastic band.
4. Make sure to leave the wig for a few hours to dry and for the curls to set.
5. When you’re happy that the wig is completely dry, remove the elastic band and gently undo each plait, and voilà!
Headband wrap
All you need is a comfortable headband that fits snugly around your head. Make sure it’s soft enough not to create any undesirable kinks in the wig as well as your heatless curls.
1. Start with your desired parting and slightly dampen the wig with water.
2. Place the headband over the top of your wig. Place the top where your hairline meets your forehead and the bottom at the nape of your neck.
3. Take a small section of hair, around an inch wide, from the front of the wig and wrap it over and under the headband. Each time you wrap the hair around the headband, add in another section of hair.
4. Repeat this process until all the hair is wrapped around the headband.
5. Leave the wig to dry for around three hours and then gently remove the hair from the headband.
Top Tip: You might find it easiest to split your hair into left and right sides and wrap one side at a time if you’re just learning how to style a human hair or synthetic wig
4. Doughnut bun wrap
The doughnut bun wrap is better for longer wigs that can easily be put into a ponytail. Keep in mind that the larger your hair doughnut, the more voluminous your heatless curls will be!
1. Put your wig into a high ponytail and secure it with a hair bobble or elastic band. Don’t tie the elastic band too tight, or you’ll have a large kink at the end.
2. Slightly dampen the ponytail with water.
3. Pull the ponytail through the doughnut hole so that the doughnut is now on top of the elastic band of your ponytail.
4. Similar to the headband wrap technique, start wrapping your ponytail around the doughnut. The tighter you wrap the curls, the more defined they will be.
5. Some ladies prefer to place another elastic band over the doughnut once all the hair is wrapped away or use hair grips to secure the hair and doughnut in place.
6. Leave the hair to dry for a couple of hours before gently unwrapping the curls, removing the doughnut and ponytail.
We hope that you have enjoyed these four techniques on how to curl a wig without heat. Why not give them a go? You may find the curls you love in a cost and time-effective way, and heatless styling methods help keep your wig in tip-top condition! For more advice and styling tips, check out our other blog posts.


Comments (4)
Hello Suzanne,
if you want to restore ‘permanent’ curls to non- heat resistant, synthetic wigs, you do it with steam. The above method with the band will work, but only temporarily.
There are many good videos, including from Simply Wigs, on how to steam-style a synthetic wig.
Basically, you first steam the wig straight before you curl it
Section hair off in locks about 3-4 cms wide, having first combed or brushed the wig as usual. Then, using a FINE-toothed comb, you slowly move the comb downwards, through each lock, following it with your steamer, right to the tip. This will give you a poker-straight, damp wig.
Heat up curling irons. The ones with a large barrel and adjustable temperature. Choose a temperature setting that is around the middle setting. Mine is 2-3.
When heated, UNPLUG curling irons and take one of the straightened locks, from the MID-SECTION winding it BACKWARDS and downwards (looks more natural) from the right, to the left, creating a backward-curled sausage. Hold for about 20 seconds, release and immediately clip with a hairgrip. You can do about 3 sections before you have to plug in the irons to reheat.
Don’t forget to unplug the electric irons before you start to use them again.
Don’t forget to clip the curls as soon as you make them, one by one.
After this, put the wig on a frame or block to DRY NATURALLY, before you unclip and shake out the curls.
This ‘set’ will then last through a number of washes and prolong the life of the wig.
It takes me about 1 hour to do this on a shoulder length wig. I’m sure that there are lots of variations on this method, but this works for me.
Please excuse my use of capitals. I don’t want to sound bossy. just want you to be safe and to achieve a good result XX
Will the curls last very long if you have a synthetic wig that is NOT heat resistant? I think I said that right. In other words, I am not supposed to use heat on my wig but I would like to curl the back.
This article has been very informative. Us girls need more information like this so has to keep our wigs in tip top condition. So from one girl to another thank you for doing this Babe.
Incredibly useful article! Thank you…
I have tried some of the methods that you describe before, but the new idea that really impressed me was putting the very slightly damp wig on a block, wrapping a velvet headband around the wig (about ‘ear level’) and then scrunching coils of hair under the band and looping some around and under the band, before leaving the wig to fully dry.
I have now tried this on a well-used synthetic wig, where the style had dropped out, on a heat resistant wig, previously tonged on a low heat setting (so surprised that it worked on this one) and on a human hair wig, usually styled with rollers. The results were good on all of these wig styles, one long and two shoulder length.
I found that, with care, it was possible to slip the wig off the wig block with the band still in place and store the wig in its box. very useful for when you want to ‘wig up and go’, as my husband always encourages me!! I shall definitely be reducing the amount of heat styling that I use. This hairband method gives a more even and natural result and it lasts reasonably well too.
I have been wearing extra hair for over 40 years. Never too old to learn, eh?
Leave a Comment